blog

November

winter tips for trees

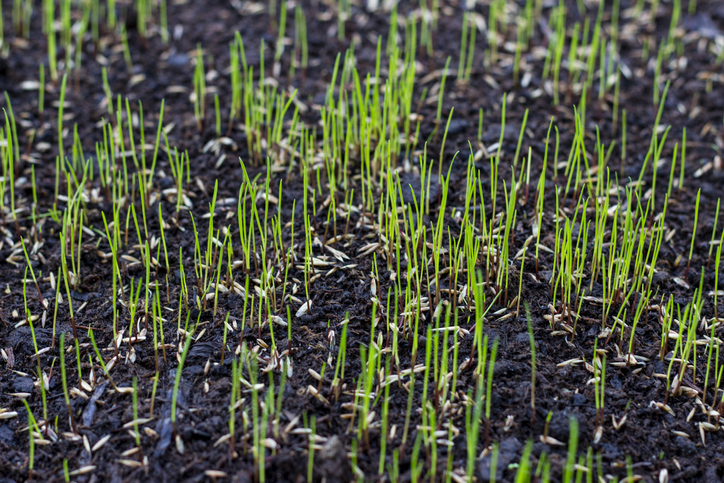
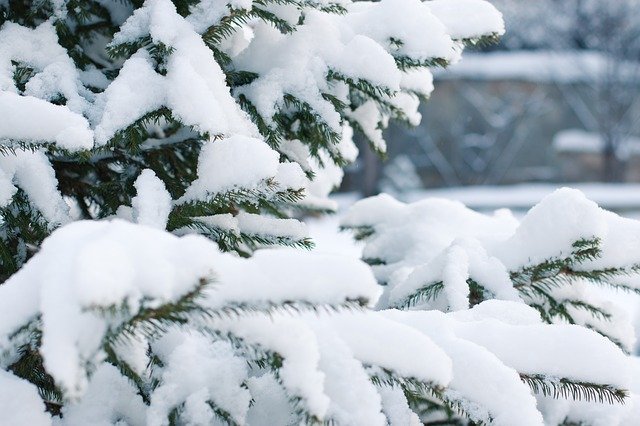
Winter is just around the corner. So, we thought we’d give you some winter tips for trees to keep your trees healthy through the winter.

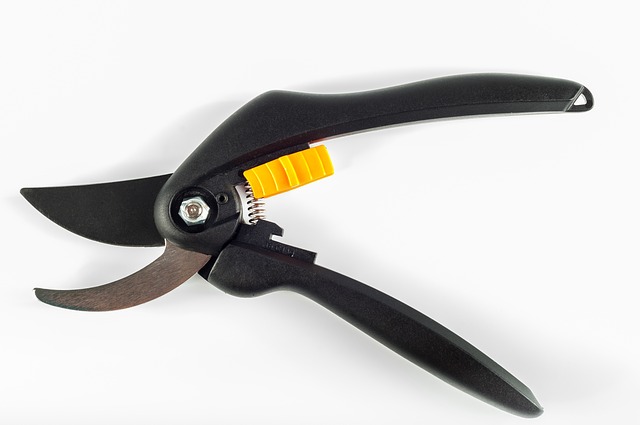
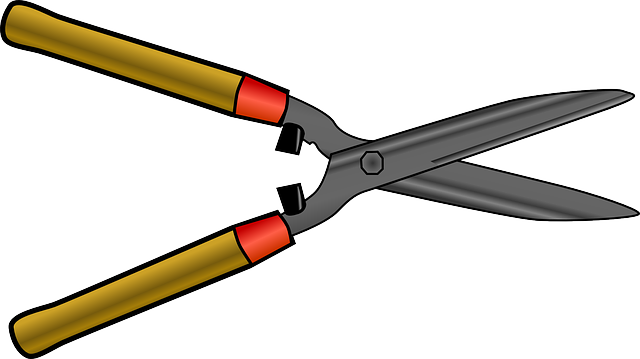
Winter Tips for Trees 1 – Prune Your Trees

Trees become dormant in wintertime. This means that it’s a great time to prune. It’s a good idea to prune the trees while they’re young. This will establish some good structure and will help with preventing future damage like limb failure.

Here are the steps to take for pruning a young tree.

  • Remove damaged, dead, diseased, and dying branches
  • Select & establish its central leader
  • Choose the tree’s lowest permanent branch based on the purpose/location of the tree.
  • Select & establish the scaffold branches

If you aren’t comfortable with doing it yourself, it’s better to hire someone to do it for you.

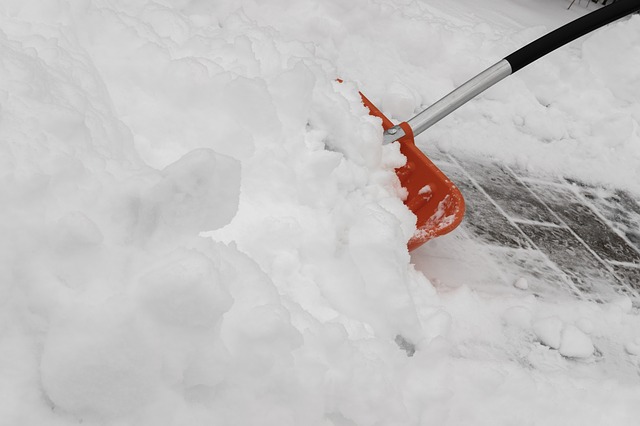
Winter Tips for Trees 2 – Protect Your Trees from Freezing

It’s a good idea to get ready to give your trees protection from the freezing. Certain kinds of subtropical and tropical trees as well as young trees can’t tolerate the colder temperatures.

Here are some tips for protecting the trees during the winter from freezing.

  • Use burlap or sheets to cover your susceptible plants and trees. Use stakes or a frame to minimize the contact between your cover and your tree.
  • Bring potted trees and plants to locations that are more protected.
  • Keep the soil moist to help with absorbing heat.

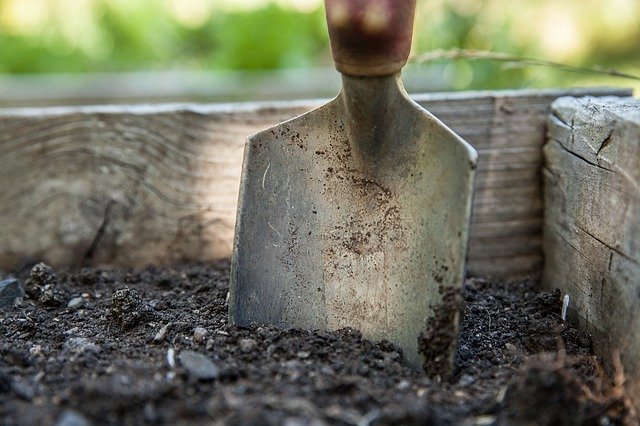
Winter TIps for Treees 3 – Mulch Around Your Trees

Cover that soil around your trees with a mulch layer of 3-5 inches beginning several inches from their trunks and going out 2+ feet from your tree all around it.

  • Use wood chips
  • Don’t mulch in a volcano shape. You shouldn’t put mulch up against your tree’s base.

Winter Tips for Trees 4 – Keep on Watering

Make sure that you are keeping trees watered when there isn’t any rain.

  • Water your young trees 1-2 weeks. Use around 10 to 15 gallons every watering. You want to keep trees that are newly planted. This will help them recover from the transplant stress.
  • Trees that are mature should be watered once per month or once every two months. Use 10 to 15 gallons per trunk diameter at 4.5 feet off of the ground. If you have a tree that’s 10 inches at 4.5 feet you’ll need 100 to 150 gallons. Remember that you should apply the water slowly to give it time to sink down into the earth.

These are some of the winter tips for trees that you can use to keep them going through the winter. We hope you have a great holiday season!

November

We are almost halfway through November, and winter is right around the corns. So we thought we’d offer you some tips on how you can make shoveling snow a bit easier and more comfortable for you and your family.

shoveling snow

Layer Correctly When Shoveling Snow

Layers are great to protect you from the cold. But shoveling’s heavy work. Your first layer should be moisture-wicking so that you’re comfortable. Then you want to choose something like fleece that will insulate you. for your top layer, wear something that’s waterproof and windproof. Layer your socks, too, with one that is moisture-wicking against your skin. Then remember your hat, a facemask, and gloves.

Start Out Slowly When Shoveling Snow

It’s a good idea to do some stretching before you go out and shovel. This will help you with easing into shoveling and will get your muscles ready for the work. You also want to begin slowly and work your way up.

Make Sure Your Back is Protected when Shoveling Snow

When you can, rather than lifting the snow push it. However, if it’s necessary to lift it, make sure your legs are kept apart and that your knees are slightly bent. Your back should also be straight. Don’t toss snow by twisting since this can cause back strain. Scoop little amounts, and you should keep your shovel near you.

Take Some Breaks When Shoveling Snow

With heavy or deep, wet snow, scoop off of the top and then gradually work through it. Take breaks regularly and remain hydrated. It’s very strenuous. If this was the gym and you did it all at once you would be hurting. Think of shoveling snow as working out.

These are four tips you can use when you are shoveling snow. Want to make it even easier? Let us do it for you. Contact us for a quote.

October

garden tools

When fall comes, one of the things you want to do is make sure that you are getting your garden tools ready for the winter. This means taking care of them and storing them properly. Below are four tips that you can use to help your garden tools last longer.

Correctly Store Your Garden Tools

garden tools

Most things that you do in your garden are done seasonally. However, even if you know you’re going to use the trowel, shears or shovel tomorrow, you should put them away. After you clean them, put them back in storage. This way they are going to stay dry and hopefully free of rust.

So that your small hand tools and trowels are kept free of rust and where you can be found, fill up a bucket or big flowerpot with sand. Then add 1 cup vegetable oil. Mix it well and then put your tools’ metal ends into this oiled sand.

If you can, hang your bigger tools from a pegboard or hooks. This is going to prevent the handles from becoming warped and help keep the metal areas dry and off of the floor.

Care for The Wooden Handles

If the tools you use have handles made of wood, that wood is going to begin drying out eventually, which will lead to it splitting and loosening from its metal part. Sanding these handles 1-2 per year using sandpaper with medium grit to remove any rough spots and rubbing using linseed oil will help protect the wooden handles and repel water.

If need be, you can replace most of the handles by taking the metal part from it and then putting the new handle on.

Oil Any Moving Components of Garden Tools

The tools that have moving components such as pruners, shears or snips will need oil so that the moving parts will work smoothly. You can do this by putting 1-2 drops of machinery oil on their hinged parts.

It also can help to take the tools apart each year and use machinery oil for rubbing the components such as bolts and screws down. This will help to remove any mineral deposits and rust that you may not know are there.

Sharpen Edges and Blades

garden tools

Any of your gardening tools that have edges, such as hoes, pruners, snips and shovels should occasionally be sharpened. 10” flat mile files can be used for the larger edges and blades and finer, smaller edges you can sharpen using a whetstone.

First wipe down your blade using WD-40. Then file your edges at an angle of 20-45 degrees. Make sure you follow its original bevel. You should finish this job off by using a nice, soft cloth to remove any of the metal shavings that are left over.

These are four tips that you can use to help keep your garden tools in good shape and working well.

September

Looking for some fall bulb choices so that you have beautiful flowers coming up in the spring? Below are top 10 fall bulbs that you can plant to have a gorgeous garden come spring.

Fall Bulb – Allium

fall bulb

These flowers are gorgeous globes of deep pink, purple or a reddish purple bloom in the late spring. They’re also called ornamental onions, meaning deer and rodents don’t care for their taste.

Bulbs for Fall – Crocus

fall bulb

These beautiful flowers are very early bloomers, and they often will appear even when snow’s still covering the ground. When they are planted thickly, they give you a gorgeous sea of color. However, since they are often dug up by chipmunks and squirrels, you shouldn’t be surprised to find them in other spots in the yard.

Fall Bulb – Daffodil

These flowers are often seen at Easter, and they’re also known as narcissus. They’re very simple to grow and dependable, and they bloom from early-late spring. Rodents such as squirrels won’t bother them because the bulbs and leaves have poisonous crystals in them.

Bulbs for Fall Dwarf Iris

These flowers have delicate blossoms and bloom in the earliest part of the spring. This flower’s petals have very interesting frills and the foliage stays beautiful even when the flowers have faded.

Fall Bulb – Grape Hyacinth

These cute little bulbs are related to the hyacinth. Their smell is not quite as deep as the larger ones, being sligltly grape, and they come in blue, ombre, purple and white flower cluters. They quickly multiply each season and they’re left alone by rodents.

Bulbs for Fall – Hyacinth

Another favorite flower at Easter, hyacinth comes in shades of blue, pink, purple and white and has a sweet scent. Their blooms last for a long time and reliably come back each year.

Fall Bulb – Scilla

These are blue-white or porcelain blue flowers in star shapes and they come up in the early part of spring. Also known as squill, they’re beautiful when planted in clusters in a rock garden, as your ground cover where grass can’t grow or beneath trees.

Bulbs for Fall – Snowflake

Snowflakes are tiny plants and they are also known as leucojum. They bloom profusely during the eawrly spring and multiply by themselves. Rodents usually do not bother them.

Fall Bulb – Starflower

These are tiny flowers, also known as ipheion, and many people don’t know that they exist. However, they have been appearing in gardens since back in colonial times. The blooms are sweetly scented and come in blue or white shades.

Fall Bulb – Tulip

Of course, we couldn’t have a list of fall bulbs without mentioning tulips. Tulips are annual flowers, so they have to be planted each year. They also are often dug up by chipmunks and squirrels. You can protect them by using chicken wire to create a cage or plant them in pots with something like daffodils, which rodents don’t like, planted on top.

Want to have some help with your fall bulb planting? Contact us and we’ll be happy to help.

September

Now that fall is here, now’s the perfect time to think about planting some fall bulbs to encourage flowers to come up in the spring. Below are some tips that you can use to help your flowers have the best start in life.

fall bulbs

Choose Quality Bulbs

When you are going to plant bulbs in the fall, you want to make sure you’re choosing high-quality ones. Look for the ones that are firm and plump. You don’t want to choose ones with mold that’s growing on the bulb or that are mushy and soft. You also want to buy large ones. When you have large bulbs, you likely have a better chance of them blooming than when you choose small ones.

Select the Right Spot for Fall Bulb Planting

Even if you have healthy bulbs, they are going to fail if you don’t choose the right spot to plant them in. The majority of bulbs will do best when they get a minimum of 6 hours of direct sunlight per day and soil that is well-drained.

Time the Planting Right for Fall Bulbs

If you want your flowers to bloom in spring, and you’re planting daffodils and tulips, they should be planted from September to October. This is when your soil temperatures have cooled. These types of flowers do best in cool soil temperatures.

Make Sure Your Bulbs are Planted Deeply Enough

If you aren’t sure how deeply the bulbs should be planted, you aren’t alone. This is a question that a lot of gardeners ask. In general, a hole should be dug that’s 2-3x deeper than the height of your bulb. Therefore, if your bulb’s 3 inches high, the hole should be 6-9” deep. But with everything else there are exceptions, so you want to check the directions on the bulb’s packaging.

Plant Fall Bulbs Point Facing Up

Another common question is how bulbs should be planted. There’s an end that’s pointed on your bulb, and that’s usually what should be facing up. If there’s not a visible pointy side, then look for where the bulb’s roots come out. This should be facing down.

Give Your Bulbs Good Soil

Just like most other plants, bulbs like soil that’s well-drained and full of organic matter. So you should mix some compost into the holes and this will help ensure they bloom well. This is important especially if your soil is heavy in clay or the ground remains wet.

Stop the Weeds from Taking Over

Weeds aren’t just ugly – they steal the nutrients from your soil and could attract disease or insects. A really easy way that you can prevent the problem of weeds is to put 2-3” of mulch on your soil. Bulbs are going to push easily through it when weeds won’t.

Water Your Fall Bulbs Well

Since bulbs are plants, you will want to water them after they’ve been planted. This is going to encourage the bulbs to establish their roots faster. This also will eliminate any air pockets which may be in your soil that could also cause them to become dried out.

Protect the Bulbs

Critters like squirrels love to dig up bulbs that you just planted. You can hide the bulbs by spreading mulch over the holes. If this doesn’t do the job, you can put chicken wire or mesh over your soil and weigh it down to stop the digging. Once your bulbs start sprouting from the ground, it’s usually safe to remove this protection.

These are 9 easy tips that you can use to plant your fall bulbs. If you are still concerned, fall plant installations is a service that we offer. Contact us today and we’ll be glad to give you a quote.

August

grass seed mistakes
grass seed mistakes

When you are putting down grass seed to create a new lawn, there are 5 grass seed mistakes that you want to avoid. Making these mistakes can cause you problems and make you lose time and money.

Grass Seed Mistakes 1 – Not Testing the pH Level of Your Soil

Before you seed a lawn, it’s important to test the pH level of the soil to find out how acidic it is. Even if your soil appears to be healthy, it might be too alkaline or acidic for growing your grass. For most grass varieties, a level of 5.5-7 is needed.

Grass Seed Mistake 2 – Not Using the Right Kind of Seed

Another mistake that many homeowners make is they choose the wrong kind of seed. When you’re looking for a seed for your lawn, you’re going to find a lot to choose from. Some types prefer a different kind of climate so they can grow. Before choosing your seed type, make sure that it works in your particular climate.

Grass Seed Mistakes 3 – Only Relying on Rain

It’s not a good idea to just rely on the rain to water the grass seeds. If there isn’t rain in your forecast, a sprinkler is needed. If they don’t get water, those seeds aren’t going to grow. However, you also don’t want to use an excess of water.

Grass Seed Mistake 4 – Not Aerating Your Soil

You want to make sure that you’re aerating your soil before you seed a lawn. This will create tiny holes in your soil for the seeds to enter. If the lawn isn’t aerated, your grass seeds simply will sit on the soil. As time goes by, these superficial seeds are going to be eaten by the animals or blown away by the wind.

When you aerate the lawn, those seeds are going to dig deeper in the soil, protecting themselves from animals and wind.

Grass Seed Mistake 5 – Not Correctly Measuring the Yard

One of the biggest mistakes that you can make when you are putting down grass seed is not measuring the lawn. Before you seed, it’s important to know just how much of the seed you are going to need for covering your yard.

When you put down too much, it’s going to mean that the seeds are competing for their root space. It can also negatively impact nutrient uptake and structure. You also don’t want to use too little. This is going to cause bare patches. Measure the yard and then order the seeds accordingly. This will help you get the right density.

If you are interested in having new grass seed put down and you are looking for a company to do it so you can avoid these grass seed mistakes, contact us. We’ll be happy to give you a quote and help you have a beautiful lawn.

August

When you are going to seed your yard, one of the things you have to do is to choose your grass seed type. But with so many types of grass seed available, how do you know which one to choose? Below are three factors you want to consider to help you find the right one.

grass seed type
Choosing the right grass seed can make a difference

Shade Levels in Grass Seed Type

This will generally affect how much shade and sun exposure your grass is able to take. Some types of seed, such as fescues do well in partial shade. Other kinds, such as bermudagrass, need full exposure to the sun.

How Much Wear & Tear Your Grass Seed Type Will Go Through

Traffic’s all about the amount of footfall you expect your lawn to take. When you choose a type of grass seed, you want to consider the species heartiness. This is going to help you with making the right decision.

This is important because you’ll choose a kind that isn’t likely to get patchy brown spots or become dry in particular conditions. You also won’t want to choose a seed that’s too coarse, too delicate, or too thatchy for what you’re going to do.

For instance, people who have young children and plan to enjoy the lawn with mini pools or water spots should choose Kentucky bluegrass instead of fine fescue.

When you are choosing your grass seed, think about what your lawn’s going to go through on a regular basis. This will help you with choosing the right one.

How Big Your Yard Is

The lot’s size is going to affect the type of seed and the amount you’ll need for a beautiful healthy lawn. If you have a large site and you are on a tight budget, a good choice is turfgrass seed.

Something to look for when you want to know how good the bag of grass seed is is to look for the PLS percentage. This measures whether a seeding reduced price is really saving you money.

PLS gets calculated by looking at how much, or the percentage, there is of pure seed is, and then multiplying that number by the germination percentage. Then that product’s divided by the number 100.

For instance, if there’s a pure seed of 85%, and a germination of 72%, the output’s 61% PLS.

Now you divide 100 by the PLS. In this example, you get 1.6, so you would need 1.6 pounds of seed with 85% purity and a germination of 72%>

The price that you have to pay is going to tell you if it’s a deal or if you want to look elsewhere.

These are three things to consider to help you choose the right grass seed for you. We offer lawn seeding and renovation, so if you are interested in a no-obligation estimate, please contact us today.

July

When you are planning to redo your lawn, the two main choices are grass seed and sod. So, which one should you choose? Seed is the one that a lot of people choose, and we are going to look at three reasons why below.

grass seed

Grass Seed is Cheaper

When you look at the price of seed vs using sod, you are going to find that it’s a lot less expensive. This is the reason why a lot of people choose grass seed. Sod can cost anywhere from 10-20x higher than using grass seed.

You Have More Choices with Seed

When you look at the different varieties of seeds that you can choose from and compare them with sod, there really is no comparison. When you have more choices, you are able to find the right variety for your lighting, soil, and climate conditions. It also will give you access to types that are better resistant to disease, drought, and pestilence.

Grass Seed Develops Stronger Roots

When you use sod, the roots are severed. This results in shallow, limited, and short. This can make it harder for the roots to establish. In contrast, seed will grow undisturbed where it’s sown. This means that it will develop a root system that’s deeper and stronger root from its outset and in the future. This means that your lawn is low-maintenance and thicker. Thanks to its deeper roto systems, your grass will be able to reach the water tables easier so it’s more drought resistant. It also will be reaching more nutrients, so you won’t have to fertilize as often.

Are you interested in having your lawn redone or maybe you simply have a few bare spots that you want to cover over? Either way, contact us for a no-obligation estimate and we’ll be happy to let you know what we can do for you.

July

Having a lush, green lawn is the ultimate goal for many homeowners. But rather than hiring someone to seed their lawn, many homeowners decide to do it themselves. Below are three common lawn seeding mistakes many people make.

seeding mistakes

Lawn Seeding Mistakes 1 – Seeding with the Wrong Kind of Seed

One of the biggest things that you have to make sure you do is to choose the right variety of grass. Grass types will vary greatly in their tolerance and preferences, as it is with any kind of plant. So you want to make sure that you are choosing the right kind of grass for your maintenance abilities and climate. When you choose a grass variety that’s right for your region will give you and your seed a good start.

Even with the seed types that are similar, all seed kinds aren’t equal. It’s a good idea to learn what’s inside those seed bags that you’re purchasing. When you understand seed tags on the products, you’ll know how good the quality is. If you are spending less money, chances are that you will get more filler and less seed, along with older seeds, more seeds for weeds, and lower rates of germination. When you purchase quality seed, it benefits your budget as well as your lawn.

Lawn Seeding Mistakes 2 – Not Being Smart with Your Soil

Success in seeding will depend on having the right environment for the best grass growth. Knowing how well your property’s soil measures up on things such as plant nutrients and soil pH will allow you to give your grass seed the right foundation. Testing your soil using a reputable local soil laboratory will eliminate the guesswork as well as reveal any changes that need to be made.

When you don’t know where the soil on your property’s soil stands, well-intended fertilizers and soil amendments might harm your grass rather than helping it. They also might just be wasted. Incorporating the specific recommendations from the laboratory will help with circumventing unnecessary setbacks and potential problems. That’s one of the main reasons why it’s emphasized by lawn specialists to regularly test your soil.

Lawn Seeding Mistake 3 – Using Lime Wrong

A lot of homeowners mistakenly believe that they need to use lime in their lawn care. But that’s not always true. Caring for your lawn can naturally make your soil’s pH go down over time. Applications of lime can benefit any lawn with low pH levels. However, there are some cases where the pH of the soil might be high already. Using a lot of lime or putting it onto the lawn when it doesn’t need it can damage it just like not putting lime down can.

When you have your soil tested and it shows that the soil pH levels are below what’s needed to grow healthy grass, putting the recommended amount of lime on your lawn can restore the right balance. It also will increase nutrient availability and help to keep your lawn green. Although a lot of the lime products are slow working, there are products that are fast-acting that help with speeding the process up and begin immediately working.

These are three lawn seeding mistakes that you can avoid by hiring a company such as ours to seed your lawn. If you are interested in knowing more about what we can do for your lawn, contact us. We’ll be glad to answer your questions. Check out our Facebook page, too!

June

Whether you want to expand your entertainment space or you simply want to give your home more value, one of the best things you can do is to add hardscaping. Below are 7 tips that you can use to create hardscaping for your home that you will love.

hardscaping

Create a Room Outdoors with Hardscaping

Hard surfaces beneath your feet and plants or physical walls can help with enhancing this effect. You’ll be outside but you’ll also have the feeling of being inside too.

Don’t Skimp on Your Materials

Although the materials are costly, you want to make sure that the hardscaping’s well-built. You also have a better chance of it lasting longer with higher quality materials.

Take Your Time

Hardscaping is expensive, so you want to take some time to figure out what you want to do. The last thing that you want to do is to spend a lot of money and then realize you aren’t happy with the plan.

Connect the Interior & Exterior

Your plan for your hardscaping should flow from your home’s interior and relate to your home’s interior design. Check your view from your home’s inside so that you are creating a vista that makes people want to go outside.

Think About Using Synthetic Turf

Fake grass that is realistic looking and a great choice if you like how a lawn looks but don’t want to spend a lot of time weeding and mowing it.

Match Your Hardscaping Materials to Your Architecture & Climate

Water and sun will make a big difference, so consult with your local professional and find out what they advise you on the right types of materials for your budget and site.

Find the Right Hardscaping Contractor

Having a professional do the work for you is one of the best ways to get it done right the first time. They will know how to handle problems that come up and can give you helpful advice on what types of materials to choose for your budget and home.

These are seven tips that you can use to create hardscaping for your home. If you are interested, we offer hardscaping services for a variety of budgets. Contact us through our website or call us at 612.548.4452 for a no-obligation consultation.